Walsh Wireless Troubleshooting
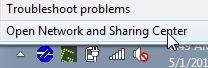
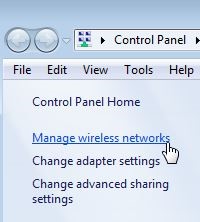
This document is used to troubleshooting your problems when connecting to the Walsh wireless.
This document is used to troubleshooting your problems when connecting to the Walsh wireless.
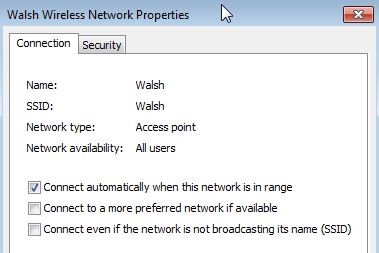
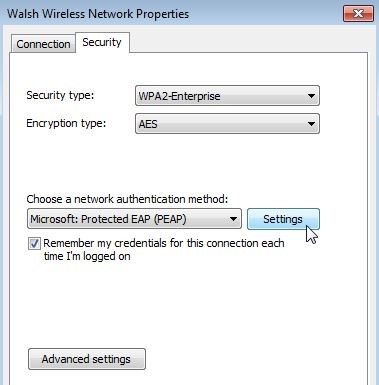
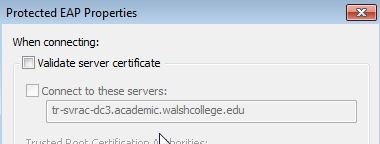
NOTE: If Walsh does not show in the list of networks on the computer, click Add above the lists of Networks. On the next window, click on Manually Create a Network Profile. Fill out the form as follows:
Network name: Walsh
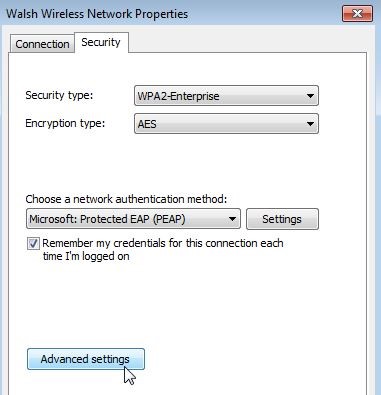
Security Type: WPA2-Enterprise
Encryption Type: AES
After filling out the form and press Next and then click Change connection settings.


| Cookie | Duration | Description |
|---|---|---|
| cookielawinfo-checkbox-analytics | 11 months | This cookie is set by GDPR Cookie Consent plugin. The cookie is used to store the user consent for the cookies in the category "Analytics". |
| cookielawinfo-checkbox-functional | 11 months | The cookie is set by GDPR cookie consent to record the user consent for the cookies in the category "Functional". |
| cookielawinfo-checkbox-necessary | 11 months | This cookie is set by GDPR Cookie Consent plugin. The cookies is used to store the user consent for the cookies in the category "Necessary". |
| cookielawinfo-checkbox-others | 11 months | This cookie is set by GDPR Cookie Consent plugin. The cookie is used to store the user consent for the cookies in the category "Other. |
| cookielawinfo-checkbox-performance | 11 months | This cookie is set by GDPR Cookie Consent plugin. The cookie is used to store the user consent for the cookies in the category "Performance". |
| viewed_cookie_policy | 11 months | The cookie is set by the GDPR Cookie Consent plugin and is used to store whether or not user has consented to the use of cookies. It does not store any personal data. |