Connecting to Walsh Wireless
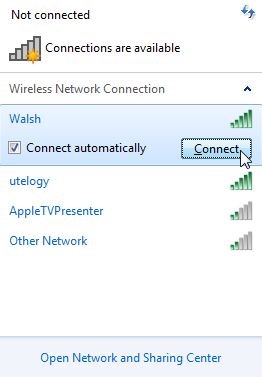
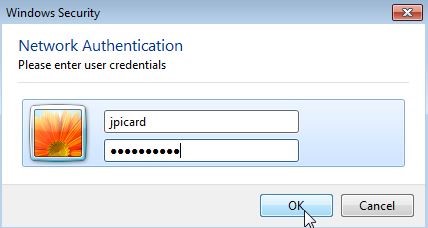
The following instructions will guide students, staff, and faculty through connecting to the Walsh secure wireless. If you are not a student, staff, or faculty you will need to use the Walsh-Guest wireless instead.
The following instructions will guide students, staff, and faculty through connecting to the Walsh secure wireless. If you are not a student, staff, or faculty you will need to use the Walsh-Guest wireless instead.

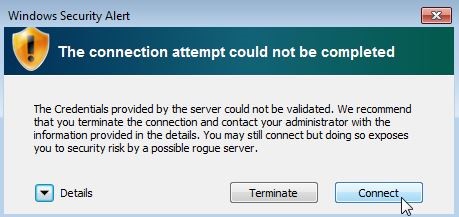
If you are still having issues connecting to the wireless after following the above steps. Please refer to our Wireless Troubleshooting Guide.
| Cookie | Duration | Description |
|---|---|---|
| cookielawinfo-checkbox-analytics | 11 months | This cookie is set by GDPR Cookie Consent plugin. The cookie is used to store the user consent for the cookies in the category "Analytics". |
| cookielawinfo-checkbox-functional | 11 months | The cookie is set by GDPR cookie consent to record the user consent for the cookies in the category "Functional". |
| cookielawinfo-checkbox-necessary | 11 months | This cookie is set by GDPR Cookie Consent plugin. The cookies is used to store the user consent for the cookies in the category "Necessary". |
| cookielawinfo-checkbox-others | 11 months | This cookie is set by GDPR Cookie Consent plugin. The cookie is used to store the user consent for the cookies in the category "Other. |
| cookielawinfo-checkbox-performance | 11 months | This cookie is set by GDPR Cookie Consent plugin. The cookie is used to store the user consent for the cookies in the category "Performance". |
| viewed_cookie_policy | 11 months | The cookie is set by the GDPR Cookie Consent plugin and is used to store whether or not user has consented to the use of cookies. It does not store any personal data. |